Thursday, September 29, 2022

Well, Sh*t...


The Beneken 1-scale BR151 Heavy Freight Locomotive in original green livery

Beauty is in the eye of the beholder.  What some may consider to be one of the ugliest locomotives of the Deutsche Bundesbahn happens to be one of my favorites, the BR151 heavy freight locomotive.

The image above is a 1-scale model from the company Beneken, a model that would be completely out of my price range.  However Marklin has just announced that this locomotive will be produced in 1-scale by the Göppingers.  The list price is set at over $3000, but I'm sure it will be available for less. Normally I could inhale deeply and bite the bullet, but a pet peeve of mine is seeing a pantographed locomotive run without overhead wire.  This means that I would need to add catenary across all visible tracks on Carstenbahn one.  That's a cost that starts at about $50 a mast, btw.  Ugh.  Maybe the upgrade to the AV receiver will have to wait.

Anyway, I thought I would share this dilemma of mine.  But as my wife used to tell our daughter, "You can have anything you want, you just can't have everything you want."


Wednesday, May 25, 2022

Carstenbahn One, Where Have You Been?

 Yup, months and months since I posted, and a LOT of time between posts.  It has also been a long time since I did any work on the layout.  Well, okay, it's been a long time since I did any work on that layout.  

What you see in the image above is a trio of modules from the Great Lakes Chapter of ETE's modular layout.  The module with all the tracks, grass and ballast is part of the staging yard from the chapter's old layout, while the two modules in the foreground are new approach modules for that staging yard.  You see, for the past six months, I have been focused primarily on the ETEGL's modular layout, and with our first exhibit looming in just over two weeks' time, things are progressing at a hectic pace.  

A pair of newly-built corner modules for the ETEGL's modular layout

If you'd like to learn more about the ETEGL and our modular layout, feel free to visit the website at www.etegl.org.

Thursday, February 3, 2022

Elevating the Experience

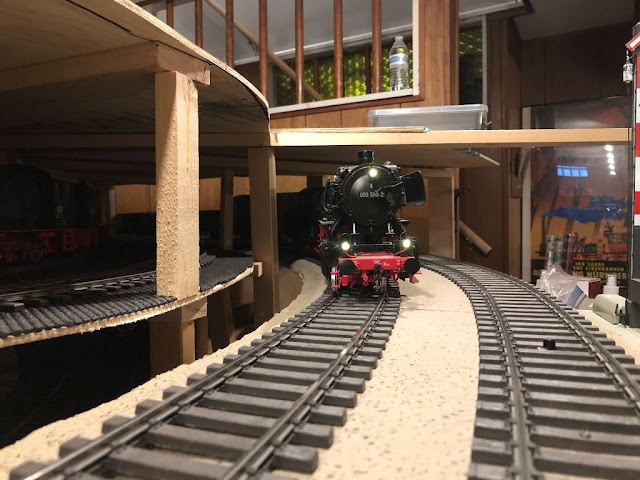
 One thing that bothered me on the former layout was that the curves were flat, while there is usually some 'banking' on real railway lines, especially in Germany, to provide more comfort for passengers on trains traversing the curve at a decent speed.  When I first laid track, I figured it wasn't 'a big deal', and didn't bother to look for a solution.  But over time, that little detail began to bother me as I watched trains enter and exit curves.  Again on the new layout I initially decided that super elevated curves weren't really necessary, and I left them out of my planning. But again, over time it annoyed me, so it was time for a solution.


The images above show the only location on the layout in need of super-elevation.  It's where the trains come out of the tunnel, and where the last of the curve straightens onto the parade section.  I won't be super-elevating the curves approaching the station, because trains are speed restricted in the station area already.  


I picked up some N-scale roadbed made by Woodland Scenics at the local hobby shop.  I figured it was thin enough so I could experiment with multiple pieces, it's flexible, and will even help with some sound dampening.  


Here you can see the roadbed, provisionally placed under the track.  Initially I tried placing a pair of roadbed pieces on top of each other, but the banking was too extreme.  After all, I didn't want this to look like a modern TGV line with trains running at 300 kph through the curve.  So this is the modest banking I decided on, using a single strip of N-scale roadbed.


With the piece of N-scale roadbed now installed, you can see how the locomotive has a gentle 'lean' to it when compared to the first pictures in this post.  I also super-elevated the other track, and the results are exactly what I was hoping for as trains go into and come out of the curve.  

The next step has already begun, at least in a test phase- the ballasting!  Stay tuned...  

Wednesday, October 20, 2021

Proper Signal Status through Digital Magic

 Okay, I may be 'overselling' this blog post via the title, but this is something that has annoyed me for a long, long time.  And that's when certain signal aspects appear and when they change, something not easy to model on a railroad that features semaphore signals.  

The photo above shows the Swiss CE6/8 II waiting for the signal to change so it can proceed.  The shorter signal with the orange circle directly in front of the taller one is the advanced signal, which tells the train driver what the next signal 'down the line' is showing, in other words, telling the train driver whether to expect to stop or expect to proceed.  The home signal behind that one protects the track directly ahead of the train, and indicates to the train driver whether they can proceed into that section of track or not.

Mechanical signals, in this case semaphore signals, are operated using long cables (at least two, one for 'halt' and one for 'proceed' for a two-aspect signal) that run from a central location in the station or a small hut out on the railway line to each and every signal.  Pulleys, tensioning mechanisms, and guides are used to guide the cables to their destination, which can be a respectable distance away.  The image below shows a few tensioners, big weights carefully designed to make sure the cables are always taut.  You can see the cables in the image near the ground if you look closely, and a set of cable guides near the bottom left-hand corner of the image.  


When you think about railroading using semaphore signals, you have to imagine the poor guy (or gal) in the signal house / tower having to throw those big heavy levers to change the signal aspect.  It's not like modern light signals that operate automatically or with the push of a button.  Also, the signal operator then needs to let the next signalman up the line know a train is approaching, and also let the 'previous' signalman know that the train has passed, so that signalman knows the track ahead is clear for the next train.  As such, there are some operational effects that I discovered are fairly difficult to mimic in model railroading.  Specifically:

 1) Signals don't automatically switch from 'stop' to 'proceed' as soon as the block (the section of track to the next signal) ahead is clear.  Instead, they switch when the block ahead is clear and a train is expected.  In actuality, the signalman gets the notification (by telegraph or phone) that a train just left the previous station and is headed their way.  That would be their trigger to throw whatever levers were necessary for switches and signals for that train's arrival and/or departure.

2) In most cases, individual levers control advanced signals and home signals.  So they would not move at the same time.  The operator would need to throw one, then the other.

3) Semaphore signals don't necessarily go back to 'Halt' the second the train passes.  The signalman will likely have prioritized cranking the railroad crossing gates back up first, or notifying the switchmen both ahead and behind them of the train's approach and clearing the previous block of track.  

4) Although the advanced signal should not be thrown to 'halt' as soon as the train has departed but only when it reaches the next block, signal operators would generally throw the lever for the advance signal right after throwing the lever for the home signal to 'halt'.  The same goes for the advance signal if the track ahead was clear.  Easier to do them together, I suppose.


Given those conditions, it's pretty hard to make a realistic simulation on a model railroad.  That is, unless you have software that can accommodate, which I do.  The easiest part was to simulate the time it takes for the signal operator to throw one lever, walk over to the other lever, and throw that.  Thanks to having 51 different sensors all being read by the computer and software, I can have the home signal throw to 'halt' a little while after the train has passed, and then have the advance signal throw to 'halt' when the train reaches the next sensor, about another five seconds later.  That takes care of items 2, 3, and 4.  Item 1 is achieved through conditional operation in the software.  Basically you tell the software, "turn the signal green only if a train just entered the previous block (by tripping a sensor) and if the block of track ahead of the signal is clear."  

When I completed the programming for item #1 I began to discover other applications of that kind of logic.  Stay tuned for a future blog where I discover how to use conditional logic to have certain train categories stop in the station and others not, plus automatic station announcements based on train activity...  


Friday, June 25, 2021

Let There Be [Smart] Light...

It has been nearly half a year since I last posted, but work on Carstenbahn One continues!  Since purchasing TrainController I have been spending a lot of time learning the software and creating schedules for my trains.  I have also had to spend a considerable amount of time 'derail-proofing' my trains, as the steep grades and sharp curves are giving me trouble.  

But I've also been playing around with other layout features.  One in particular, lighting, has been on my list for a while.  In a few of the layout pictures I have shared you can see the track lighting and cans that I use to light the layout.  After playing around with the Philips Hue smart bulb technology I ended up buying a half-dozen smart bulbs, replacing the 'regular' lightbulbs in the fixtures above the layout.  Using the Philips Hue app on my phone, I am now able to change the color and brightness of the bulbs, either individually or as a group.  The result?  I can simulate all sorts of lighting 'scenes'.  

Here are a few examples:


I took the photos above with light streaming through the egress window so the colors are a little washed out, but you can imagine what I was going for- evening, morning, and night.  

I then used a third-party app called iConnectHue that allows macros (sequences) to be written using those different lighting 'scenes'.  The result?  I can now run a day-to-night-to-day simulation and trigger it on my cell phone.  I have a couple of 'versions' of this sequence, one that takes about two minutes, and another that takes about six minutes.  It all depends how long I want to stay in the dark 😉.

I went a little overboard, and now have smart bulbs in every light fixture of the basement.  Another macro I wrote will now fade out all the other lights in the basement before the nighttime sequence on the layout begins.

The next challenge will be to have the streetlights on the layout and lights in the buildings come on automatically as 1:32 day turns to 1:32 night...


Saturday, January 2, 2021

What a great year 2020 was!

"Carsten, you have lost your mind!"  This may be what some of you are thinking as you read the title of this blog entry.  But for the topic of this blog, namely my continued work on my 1-scale layout, 2020 was amazing, at least in terms of the progress I made.  Here's an image from about a year ago:


Yup, that's the lower staging yard (henceforth known as the Lower Schattenbahnhof, or LSB) as it looked in January 2020.  A year later I am done with the benchwork, have all the track laid, and that Schattenbahnhof is now buried three levels deep under other track!

Even though I haven't added entries into the blog since September, work has continued, with a flurry of activity in December.  First, I completed installation of almost all of the reed switches on the layout.  There are a total of 51 of them now installed on the main line, and I will likely install a few more on the freight yard sidings.  

There are four Digikeijs DR4088GND feedback modules connected via CAT6 cables to the Intellibox.  The 51 reed switches around the layout are part of 17 individual blocks, three sensors per block.  The blocks are arranged around the layout like this:


What you are seeing above is an image of the track diagram I created in TrainController software, which I am now using.  LSB is the lower Schattenbahnhof, USB is the upper Schattenbahnhof (staging yard / hidden station).  I know, the terminology is a mix of German and American English, but then so am I!  Note the trains situated in the staging yards and on the layout.  Pretty cool, eh?

Aside from the work with wiring up all those reed switches I have been buried in the manual of TrainController Silver, the package I have purchased.  An upgrade to Gold may be in my future, too.  But for now, Silver does everything I want it to do- assuming I figure it out!  The learning curve is steep, but there is a large online community that has been very helpful.  It has also been lots of fun watching the software follow trains around the layout!

Three trains are ready to depart the Lower Schattenbahnhof (LSB).  With TrainController I suspect I will have between 4 and 6 trains running at any given time, with three more on sidings in the two staging yards.  

Is that a new siding?  Yup, I decided to liven up the south end of the station with a short siding that will be used for loading lumber and other goods onto appropriate freight cars.

Okay, more coming soon as I continue to play around with the software and begin what is hopefully the track ballasting and scenery work!

Happy New Year, all!

- Carsten


Thursday, September 24, 2020

Let the Fun Begin!

 My wife is an over-the-road trucker, which means she doesn't make it home more often than about every three weeks.  Her visits to the basement are even more infrequent.  However this past weekend she was quite interested in seeing the progress I had made on the layout.  She followed me down to the basement and gasped in astonishment when she saw how much has been accomplished.  I smiled broadly at her admiration.  This she followed up with, "Okay, so?"  "So what?" I retorted.  "So let's see it run!" she demanded.  This was followed by, "And why does the big steam locomotive not have any cars behind it?"


I really hadn't spent a significant amount of time running trains, and certainly there were some trains that had been prone to uncoupling and other maladies, including the afore-mentioned 'big steam locomotive', my KM-1 BR50.  There were plenty of trains on the layout, but mostly for show, and for making the blog entries look like <ahem> everything was running fine.  Well, this was going to be the test.


At some point she left and went back upstairs.  Me?  I was too busy managing the throttles of the Intellibox to notice her departure.  She had opened Pandora's box.  In no time I had four trains running around the layout simultaneously.  Thankfully the trains stayed on the track and remained coupled.  I kept gasping in horror as several times two trains appeared to be ready to collide.  But the truth was, there were no collisions, not even close.  In fact, even with four trains running simultaneously there is enough distance between them thanks to the long main line that, not only did I not have to constantly adjust throttles, but the layout itself didn't seem overloaded.  Until I get used to operating the layout my mind will continue to assume that the small layout space means trains are close to colliding.  But the truth is, the main line would be over 150 feet long if it were laid out straight.  That's a train roughly every forty feet.


Running trains has become a daily occurrence, and I find it to be an amazing stress reliever.  Here are a couple of pictures from today's operating session:

The BR50 is pulling a coal train (well, a string of empties until I create coal inserts) while the V200 and it's FD-Zug wait for the signal to turn green.  The BR50 is headed from the parade section down into the bottom staging yard, while the FD-Zug is going to be entering the station above it as soon as the signal changes to Hp1.

The signal turns green for the FD-Zug 'Gambrinus' just as the last coal car passes the block signal.  The Big diesels in the V200 are roaring to life and the locomotive is about to move...  

Saturday, September 12, 2020

Things are coming together...

Well, everyone, I'm happy to report that progress on Carstenbahn One continues.  I added some more benchwork to widen the top station level.  This was done to provide enough room for the Vollmer 'Neuffen' station building.  I also painted the top of the station a light brown.  Here's how it looks with the station in place:


As you can see I also placed the signal tower in a provisional location.  Same goes for the freight depot:


Here is a view from the opposite end of the layout:


There are a few Preiserlings sitting on the loading dock of the freight shed in the station.  They are probably wondering when we might see a train...  

Well, as you can imagine, the answer was "very soon!"


The local passenger train made up of a V100 and three-axle 'Umbauwagen' has been waiting a few minutes for the arrival of the F-Zug, pulled by the beefy V200.  Meanwhile a pair of V36 diesels pulling a freight train wait at the signal at left for permission to ascend the grade up to the station.  

Next I will wire up the switches and remaining reed switches, and begin the programming of the layout... 

Wednesday, August 12, 2020

Christmas in August

I read back through the blog a ways and must say I find it amazing how much has been accomplished on the layout this year.  What normally would have taken a few years has been completed in a matter of months.  The progress culminated last Saturday when, for the first time ever, I was able to run a train all the way around the layout.  What did I pick to commemorate this historic moment?  My gorgeous BR50 from KM1?  My MBW V200?  Maybe my very first 1-scale locomotive, the class 212 diesel-hydraulic?  Nope.  Without any fanfare, and to give me the best chance of success, it was my diminutive tank locomotive with a Maxi track cleaning car...

And successful it was, until the train approached the station.  I had forgotten that the curved turnouts from Huebner had polarized frogs, and without them being hooked up there was no power to the locomotive, so I had to attach feeder wires to those.  Since I'm only using one station track in each direction in the station right now I could get away without having to keep switching the polarization.  Anyway, after that was taken care of, it wasn't long before more and more trains found their way around the layout.  Not everything went as smooth as hoped.  The grades are very steep, and the F-Zug coaches are routinely ripping the couplers out of the sockets, breaking the tabs holding them in in the process.  I will need to come up with a more permanent coupler solution for those, I think.  But the train makes it up the grade and fits in the station!

By-and-large, the first few days of running have been a success.  I'm very happy to watch the trains traverse the different levels.  I still haven't watched enough to see where and when to expect a trains to appear next, i.e. what level and what track, so running trains is still a bit of a mystery.  

Still, I was able to run two trains at once, and at prototypical speed they take three to four minutes to traverse the layout once.  Here is a video of the parade section:


I think my favorite aspect of the layout is the broad curve of the station tracks on the top level.  It adds quite a bit of realism and elegance to that section, and I hope I can get the tracks lined up without kinks and parallel throughout the curve.  

Oh, and lastly, I figured out the short lead and stub siding to the 'north' end of the station, providing both a scenic element and some operational fun.  

There is still so much to do.  Hopefully I don't get distracted by being able to run trains, now...


Stay tuned!


Wednesday, July 29, 2020

And... ...We're back!

About a month after the last post I'm back at work on the layout.  Although I still don't have all the track I need to finish the main line I have enough to proceed with at least attempting to figure out the hardest part of the layout- the station.


The little device above will be instrumental in completing the station.  As mentioned in the previous post, I was going to need to bend a bunch of rails into radii that just don't exist.  The solution? Use Marklin's 5998 flex track kit and make them myself.  I had the track kits, but had no clue to what I was doing.  Step one was understanding how the track kits work.  Turns out they are easy to understand and very smart!  The only issue I had with the process was the rather unscientific way Marklin suggests bending the rails.  So instead I went in search of a rail bender, and discovered the beauty you see above, the Rail Ben 250 from Sunset Valley Railroad.  The Rail Ben 250 was designed for, as you can guess, code 250 rail, i.e. G-scale.  It takes a little practice, but the Rail Ben 250 works with Marklin 1-scale rail, which is actually code 200, I believe.  A little practice bending and unbending rails, and I was ready...


Those are the four station tracks at the 'north' end of the layout.  I laid them out provisionally this evening to see how they looked.  They look a little ridiculous going from the tight radii at the far end to the broad radii further down, but I'm hoping the signal tower, station, and a few well-placed trees help hide the tight curve as it comes out of the tunnel (yes, the plan is to have a tunnel at each end of the station).


About two-thirds of the station tracks are made of the gentle flex track.  The other third, towards the bottom, will be straight.  As soon as the remaining curves arrive (looks like I need two more to finish the main line) I can complete the track plan and be ready to finally run trains around the layout. 

More to come, hopefully soon!


Tuesday, June 23, 2020

FULL STOP

Well, this may be the last post for a while.  I have run out of track.  

"But Carsten, how can that be?"  Well, I'm glad you asked.  

It all has to do with the picture-a-day calendar someone on one of the Marklin Facebook groups posted back in January:


I admired this photo for a good long time, specifically how cool and realistic the gentle curve of the station looked.  I have decided that, instead of straight station tracks, I want to use some of the Marklin 1-scale flex tracks to build a gentle curve into the station.  I have some of those Marklin 5998 flex track building sets, but was planning on using them to build the final curves I need on the ends of both of the ramps coming up from the middle section.  So now I need more of the 1020mm and 1176mm radius curves.  And they are hard to find and damn expensive!

That's not to say there hasn't been any progress...
This is the section of the layout against the back wall.  The place where trains are parked is the three track staging yard on the lowest level.  What sits above it are the two opposing ramps leading up to the third/top/station level.  These two will loop around and connect in the station.  If you look to the right of this photo you will see...
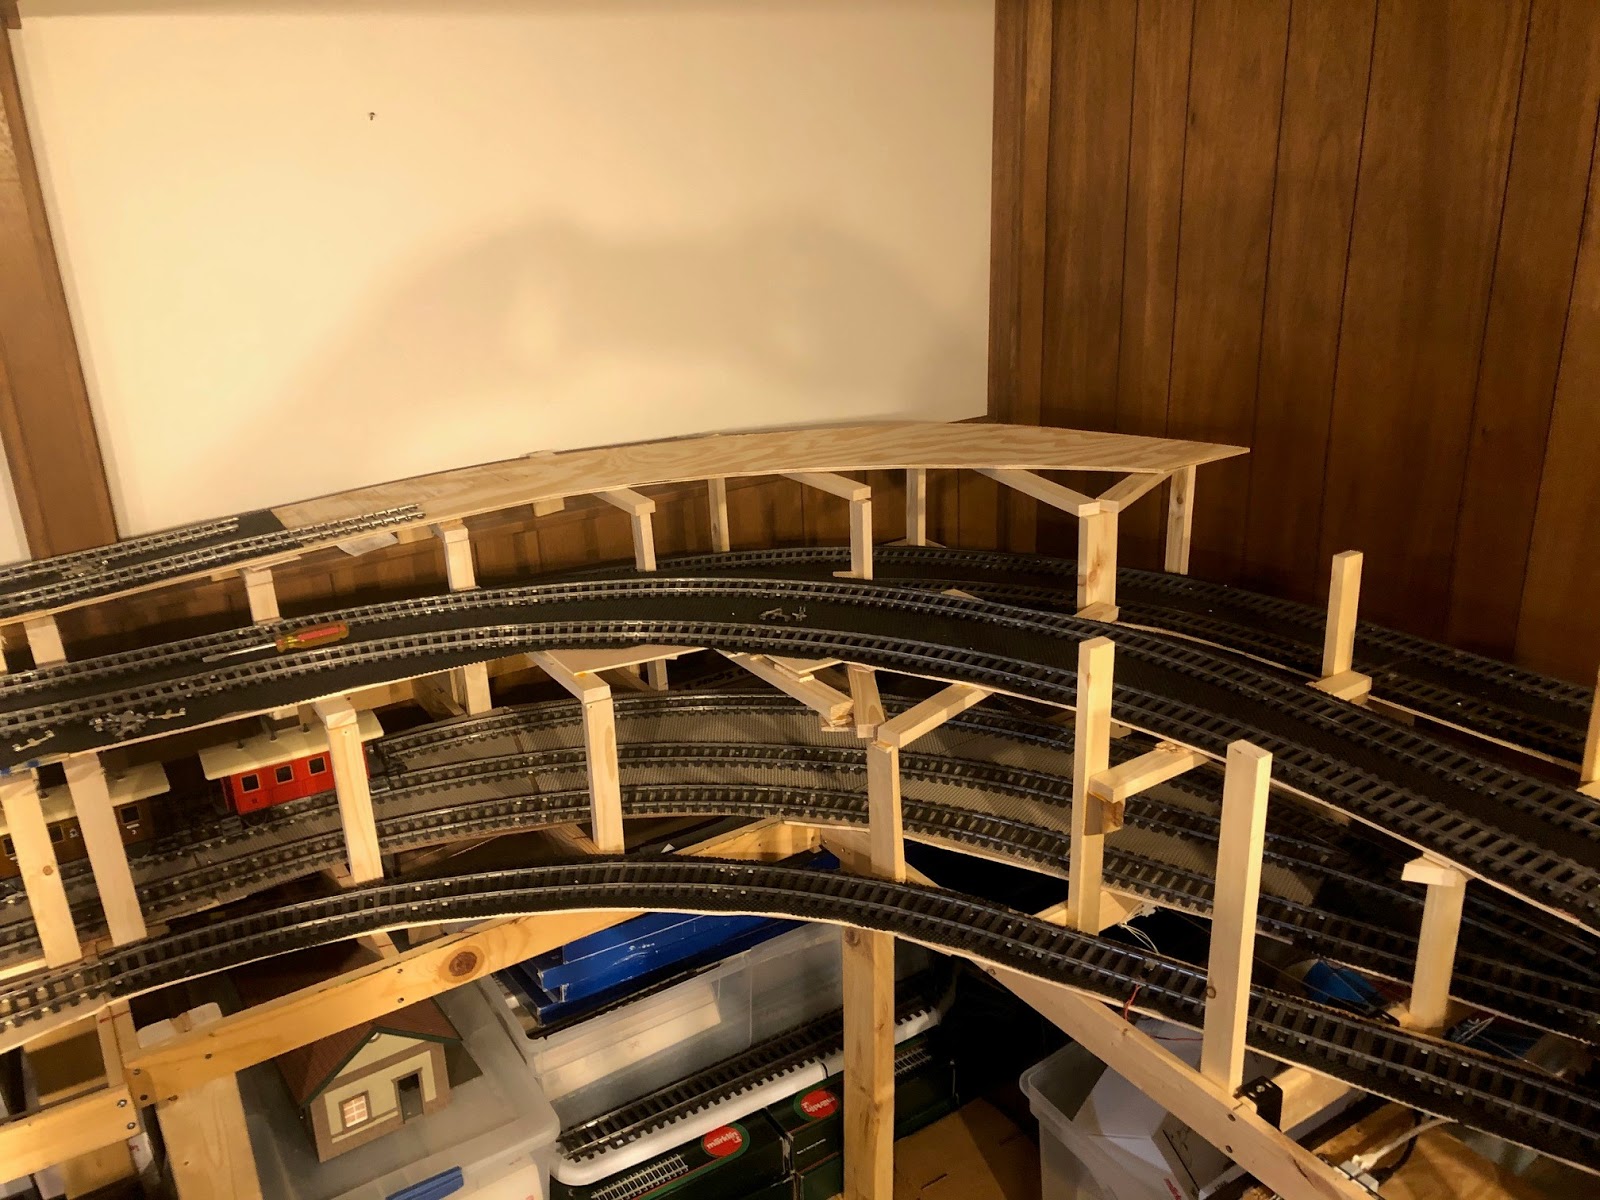

...the track benchwork swinging around towards the front of the layout.  The track will come around another 45 degrees at the end of the benchwork before the station switches.  Note the lack of curves.  To complete the curved section on this side approaching the station I need 6 of the 1020mm and 1176mm curves.  Now, if you were to instead look to the left of the previous picture of the two ramps you would see...


...the track benchwork from the middle level swing up and around the curve here, too.  Again, I'm missing some pretty important curved track.  However on this, the 'north' end of the layout, you can see that I have proceeded further with the building of the track roadbed, and that benchwork, at least provisionally, continues all the way to the front of the layout, where...


... I have done some provisional laying of track at the entrance to the station.  The right-most tracks (the shorter ones in the image above that split from the right-most curved turnout) are the station tracks in one direction, and the two tracks next to it are the station tracks going in the other direction.  The track on the left that comes off the left-most curved turnout will go to a small yard, only two or three tracks.  This small yard will give me the ability to take manual control of a train or two to do some shunting in the yard versus just watching trains run around the layout.  

Note how the two tracks in the middle (the two 'left' station tracks) have a slight bend to them.  These are, in fact, built with the Marklin 5998 sets.  In both cases I started the three-foot long section of flex track with a tighter radius and then went to a broader radius for the gentle bend in the station.  

As soon as I get my hands on the needed curves I will post again, hopefully with pictures of the rest of the station with the gentle bend in it... 


Friday, May 22, 2020

It's always the one you least suspect...

I was finishing up the second level (yes, it's done) and it occurred to me that I hadn't even tested all the train cars to make sure I had sufficient clearance between the tracks and the risers for the tracks above.  Sure, I had grabbed my longest coaches, but what about all the different locos and other train cars with overhang?  And most important, what about my 'pride and joy', my KM-1 BR50 steam locomotive?  

I held my breath for each locomotive- the V200 from MBW, the BR50, the Shunting Crocodile, and the pair of V36's.  I ran the three-axle 'Umbauwagen' and my longest freight cars.  I breathed a sigh of relief- all seemed to clear the layout without any clearance or interference issues.  As I moved trains out of the lower staging yard for the next phase of construction, the whole operation turned into a disaster.

This guy.  This little Marklin Maxi baggage car started around the layout on the bottom level behind a Maxi locomotive and proceeded to HIT EVERY SUPPORT on the front side of the lower level.

If you look closely you can see why.  That little step under the baggage door sticks out further from the track than anything else in my entire rolling stock collection.  I halfheartedly considered grabbing my Dremel tool and making quick work of the offending steps, but after my conscience stepped in, followed by a string of obscenities, I went to work with both shaving off some material from the supports and repositioning the tracks.  Between the two, the baggage car now clears all the risers interference free.

So for anyone out there who is planning and/or building an elaborate layout in any scale, be sure you check clearances with every piece of rolling stock you have.  Because like me, you may discover that your worst enemy is the one you would never expect... 

x

Wednesday, April 29, 2020

On To the Second Level and Center Section

The answer to the question in my last post about getting the second level done before Easter is "Yes, sort of".  I did get the bottom level and a good chunk of the second level completed, but it may have taken slightly past Easter to achieve it.

The beige roadbed on the right side of the photo above is the formerly white foam from the previous post.  I gave it a light brown paint job which will form the basis of ballasting it.  This way if there is any sort of gap in the ballast you won't see bright white shining through!  


I have started to install the risers for the top level, where the station will be.  When I first started the layout I tried to be very careful about the height of the original benchwork because I wanted to make sure that the top level wasn't too high up (it's hard to visualize when you don't actually see anything other than an empty room).  I'm a little nervous that I may have gone too high.  We shall see once the station is in place!
  

And finally I added the benchwork for the middle of the layout.  Unfortunately it means I have to duck now when I go from one side of the layout to the other, but it was time.  This center benchwork is where the two returns for the ends of the dogbone, one on the bottom and one on the middle level, are located.  As you can see in the picture above I have already installed supports and provisionally laid the track in the middle.  Also, in the foreground  of the photo you can see the two-track staging yard for the middle level on the left coming together via the switch in the foreground. EDIT: It occurs to me that the track plan shows that the staging yard for the middle level was supposed to be on the other side of the layout, above the lower staging yard.  I discovered that I needed a little too much space over there, and that it made more sense to have the staging yard tracks on the opposite side.  So a train coming from the station will enter the second level on the track on the inside of the second level (the track directly above the switch in the foreground), go across the middle via the upper return, swing around to the left in the back where the two-track staging yard starts, and then come down the left side, around the bottom / foreground, and back up to the station.  The idea is to have one train coming into the staging yard and the train on the other track going out.  This mixes up the traffic in the station a little.  

Next up is finishing the center section and the return loops, and adding the benchwork to make it up to the top level of the layout!

Wednesday, April 8, 2020

The Upside (if there is one) to COVID-19

I took a look at the January 23 post to see what progress had been made on the layout just over two months ago.  What would normally take years has been completed in a matter of weeks.  Without further ado...

I took my test oval apart (leaving the staging yard in place, of course) and began the bottom level main line.  I chose to leave off the 'return' on the dog bone that cuts through the middle of the layout so I wouldn't be restricting my access to the area in the interior of the layout, or have to duck and crawl under that center section all the time.  My plan is to leave that open as long as possible, likely until the bottom and middle layers have been built, and only installing it before adding the station on the top level.  The first step was to build the incline out of the bottom level and through the parade section on the middle level.  

The incline from the bottom level to the middle level has no tracks underneath it, so I could use some 1x10 plywood to build risers for the track.  Note the clamps on the risers- I switched from screws to glue to hold everything together.


The image above shows the same section (in the background) as the picture above it with plywood and shelf liner added.  I also have the curve on the right side of the layout done, coming up from the bottom level.

Next up is the parade section, which requires realistic track ballasting and scenery.  I used an old trick from the original Carstenbahn One using Styrofoam and a hot knife to form the roadbed.


The rectangular foam sheets get glued to the plywood roadbed and are carved to fit using the hot knife. 

  
Before carving the embankment it's important to place the track in its final position.  I have to make sure there is enough clearance between the tracks.  My passenger cars have the biggest overhang so I use a pair of those for clearance testing.   Although I used the Marklin 1-gauge flex track kits to have a gentle curve transitioning to the straight section of the parade line, I did have to use the 'swine radius' for part of the curve.  

Once the track was properly positioned, I use a self-bent wire in the hot knife to carve the edges of the roadbed.


And there is the result before painting and ballasting.  The flex track looks really nice,  Had I known how good this would look (and how short the parade section would be) I would have made the curve longer!


I have continued to build the roadbed on the second level.  The curved sections are particularly difficult to support.  In addition, I discovered that by putting the tracks on the lower level all the way to the edge of the layout I didn't leave a spot for the supports for the levels above it.  

My trio of clearance testers!

So that's where we are now.  The bottom level is done except for the wiring of the reed switches and the track switches, and the middle level has been started.

Now, can I get the middle level done before Easter?